Introduction
Building a fence on flat land is straightforward, but what if your yard or property has slopes, hills, or dips? That’s when knowing how to build a fence on uneven ground becomes essential. Uneven terrain presents challenges like gaps, misaligned panels, or unstable posts. With the right techniques, however, you can achieve a sturdy, professional-looking fence that follows the lay of the land without compromising strength or style.
Why Building a Fence on Uneven Ground Matters
Ignoring slope when installing a fence often leads to structural issues and poor aesthetics. Here’s why this task is important:
- Keeps animals and pets secure: Prevents gaps under the fence that small animals could slip through.
- Improves appearance: Proper methods create a neat, uniform look instead of a jagged, uneven line.
- Boosts durability: Correct installation ensures posts and panels don’t warp or collapse on sloped ground.
- Property value: A professionally built fence on uneven terrain adds curb appeal and functionality.
A fence is only as strong as its foundation—so adapting to the ground conditions is critical.
Step-by-Step Guide to Building a Fence on Uneven Ground
Step 1: Assess the Slope
Walk the fence line and note where the ground rises and falls. Decide whether the slope is gentle (a few inches over several feet) or steep (significant drop-offs). This will determine which installation method—stepping or racking—is best.
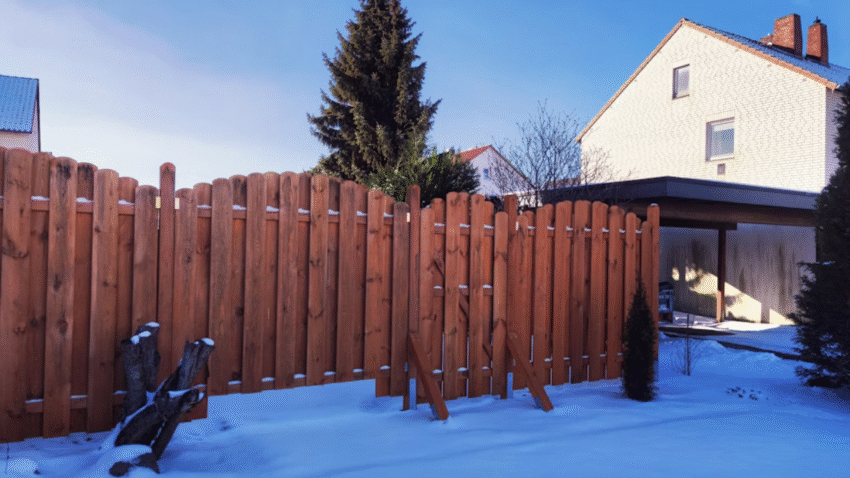
- Stepped Method: Panels are installed horizontally, with each section dropping down in steps. Works best for steep slopes.
- Racked Method: Panels are angled to follow the slope gradually. Best for gentle, consistent slopes.
Step 2: Mark the Fence Line
Use stakes and string to outline your fence path. Keep the string tight to show how the fence will align with the slope. Mark post locations at even intervals, typically 6–8 feet apart.
Step 3: Gather Materials and Tools
You’ll need:
- Fence posts (wood, metal, or vinyl)
- Panels or individual pickets
- Concrete mix and gravel (for posts)
- Level, tape measure, and string line
- Post-hole digger or auger
- Drill, screws, or nails
- Safety gloves and goggles
Step 4: Dig and Set Fence Posts
Dig post holes one-third the length of the post (about 2 feet for a 6-foot fence). Add 4–6 inches of gravel for drainage, then set posts in concrete. Make sure posts follow the slope, either in step-down fashion or angled slightly for racked panels. Allow 24–48 hours for curing.
Pro Tip: Corner and gate posts must be extra secure—dig deeper and use more concrete.
Step 5: Install Rails
- For Stepped Fences: Attach rails horizontally between posts, dropping down at each section. The top of each panel will appear level, but the bottom will step down.
- For Racked Fences: Angle rails to match the slope, keeping them parallel to the ground. Use brackets that allow for slanted attachment if needed.
Step 6: Attach Panels or Pickets
- Panels (Stepped): Attach full panels so each section steps down. This leaves triangular gaps under panels, which you can fill with landscaping stones or additional pickets.
- Panels (Racked): Use flexible panels or adjust brackets so panels angle with the slope.
- Individual Pickets: Attach one picket at a time, aligning tops evenly while following the slope at the bottom. This method gives the smoothest look on uneven ground.
Step 7: Install the Gate
On sloped ground, gates require careful planning. Always place gates on the highest level possible. Use adjustable hinges if the slope prevents a standard swing.
Step 8: Inspect and Reinforce
Walk the fence line, checking for gaps, leaning posts, or uneven tops. Make adjustments before finishing. Add extra pickets or lattice if small gaps remain under the fence.
Common Mistakes to Avoid
- Mistake: Using Flat Panels on a Steep Slope
- Problem: Large gaps form under the fence.
- Solution: Use the stepped method for steep slopes or install pickets individually.
- Mistake: Setting Posts Unevenly
- Problem: Rails won’t align, and panels won’t fit.
- Solution: Measure and level posts carefully before concrete cures.
- Mistake: Ignoring Drainage
- Problem: Water collects under the fence, rotting posts or washing away soil.
- Solution: Add gravel bases to post holes and grade soil to slope away from posts.
- Mistake: Poor Gate Placement
- Problem: Gate drags on the ground or won’t swing open fully.
- Solution: Install gates on the flattest section of your fence line.
- Mistake: Uneven Picket Spacing
- Problem: Fence looks sloppy and uneven.
- Solution: Use spacers and check alignment with a string line.
Extra Fence Tips & Hacks
- Fill gaps with landscaping: If small gaps remain, use stone, gravel, or ground cover plants for a polished finish.
- Use adjustable brackets: These make it easier to install rails and panels on slopes.
- Choose vinyl or composite: Flexible materials are easier to rack along uneven ground.
- Custom cut pickets: For a professional look, trim picket bottoms to match the slope.
👉 For added strength, check out our guide on how to install fence posts without concrete—perfect for sloped areas with tricky drainage.
Conclusion
Building a fence on uneven ground requires patience, planning, and the right installation method. By choosing between stepped or racked panels—or installing pickets individually—you can adapt your fence to any slope. With secure posts, consistent alignment, and attention to detail, you’ll create a strong, attractive fence that follows the natural contour of your land.
💡 Remember: the ground may be uneven, but your fence can still be sturdy, straight, and stylish.
